Sunday 18 February 2018

Evaluation 4

How did you use new media technologies in the construction, research, planning and evaluation stages?


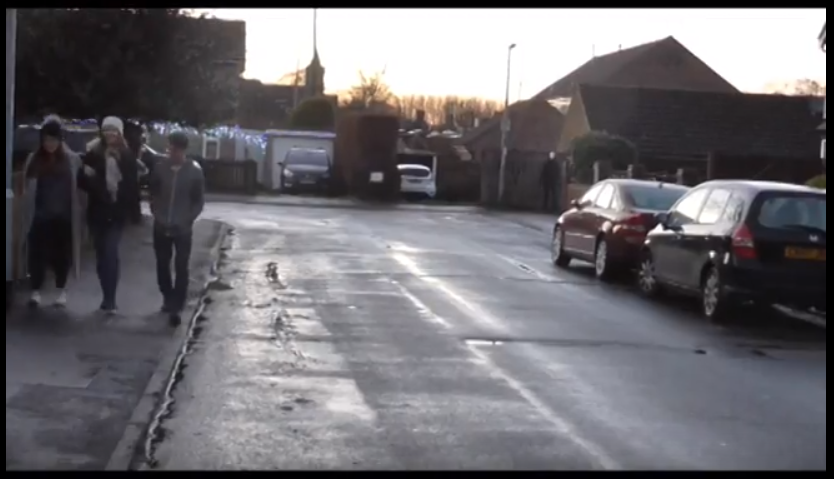
Video camera (Panasonic HC-V130) - We used this camera to film all of our shots in high quality. The camera allows the user to zoom in and out which allows for a range of camera angles. This allowed us to experiment with the different camera angles to decide which was best. The camera is a lot smaller than traditional/old cameras, this made it a lot easier to film in various locations, at the cost of quality of more expensive cameras which is fine for our product. An example of this is some of the shots in which we didn't use a tripod in order to make it seem like the camera was from the perspective of one of the actors, this would've been a lot more difficult with a larger camera. It was also easy to upload the footage onto the computer to use, as it just requires a cable.


Photoshop - Photoshop was the software I used to create the logo, age rating, poster and magazine cover. It allows for a wide range of features, including: filters, gradients, blurring, burning, sharpening, text, shapes, etc. The feature I used the most was probably the blur tool, this allowed me to manipulate the text so that it looked even more hand drawn than with just the font. It also allowed me to create a smoky border around my magazine cover to make it seem more eerie and that there is more going on. The gradient tool can be used to make an object look darker/lighter (similar to the burn tool) which is good for making an object look as though it is coming out of the darkness behind it. The various filters can be used to make the image look more interesting, for example: I used a monochromatic filter on my magazine background to draw attention to the main image and make it look eerier. The burn tool was also used a lot; I used it to darken the building in my poster and also to make the mask look darker. The eraser and quick select tool are also very useful; they can be used for different things: just removing things, automatically, selecting things and doing something with them, manually removing parts, etc.


Premiere Pro - Premiere Pro was the software we used to edit together our trailer. By importing the various clips and music tracks into the program, we are able to place them and create a video. It also allowed us to watch the product to see what we needed to do to improve it. Another feature is adding text for inter-titles. Also, we were able to place different pieces of audio onto different tracks allowing us to have background music and sound effects. Furthermore, we were able to cut the audio and video tracks when/where we needed. This allowed us to split one clip into various others which is suitable for the thriller genre where multiple clips are required. Any clips we didn't need could easily be gotten rid of too.


Phone - My phone was also very important; phones nowadays can do a lot more than they could a few years ago, they can: take photos, use the internet, send messages/photos, use apps. I mainly used my phone for messaging other group member(s) to try and organise meeting/filming times which is very convenient. This was mainly done through Facebook messenger. I also used the camera to take photos of pieces of work that we had done and that I needed to put onto my blog.


Blogger - Blogger is the website I am using to upload all of my research, planning and products onto. The website makes it very easy to organise each of my posts; it is easy to find what to look for as a result of a suitable title, which is followed by a description/image of what to look for. Furthermore, the design of the site made it easy to use and work on multiple projects at the same time.


YouTube - I used YouTube to upload any videos I needed for my blog. This was done by saving the video in Premiere Pro, and then uploading to Adam's YouTube account so that we could access the video files from anywhere. Blogger also enabled us to embed the video files within a post which was useful for some posts such as the ones showing our draft/final product (trailer). Sometimes this didn't work and a link was needed instead, but this was still more efficient than needing to search for the video.


Word - Word was primarily used to create scripts, such as: for the trailer and as a plan for what to say in our pitch. In addition, it allowed us to easily view the various fonts and decide on which one would be best for our genre/narrative.


Publisher - Publisher was used in different ways. The main way was to crop screenshots of trailers so that they could be saved as an image file and uploaded to my blog. Sometimes, I also used it as an alternative form of analysis for posters to make my blog look more interesting.


PowerPoint - PowerPoint was only used for the pitch of our film. We used it because it allows us to display different subjects on different slides, making it look a lot more organised and interesting than if we just spoke about it.


Facebook - Facebook wasn't used much, rather its messaging service Messenger was. Messenger allows the user to send messages directly to someone or to a whole group. This made organisation a lot easier - as I previously mentioned.


Wordle - I only used Wordle once on my post "Thriller conventions" as I thought it would look more interesting than simply writing them all out.


Strawpoll - Strawpoll was used to poll a group of people as to which design of our title they preferred, and we ended up using the one that got the most votes.


Friday 16 February 2018

Evaluation 3

What have you learnt from your audience feedback?


Changes to trailer (first draft):

Positive:
  • Good characters
  • Good lighting
  • Nice name/title (design)
Improvements:
  • Music/Sound effects (scream)
  • Pace
  • Chronology (News report at start?)
  • Inter-titles

Change 1: Use better music/sound effects - Originally, we only had one music track that we used when the main antagonist was revealed and kept it playing from there. As part of our feedback, we were told to use more sound. As a result we put in more clips that we were originally unable to use due to the computer not displaying them and put a  "boom" sound effect over each of them to make it seem like more of a surprise to the viewer. In addition, our audience wasn't a fan of the scream at the end of the trailer, we contemplated putting it elsewhere in the trailer but ultimately decided it would be better without it as it is overused and more fitting for a film of the horror genre.

Change 2: Make it faster paced - Our first draft was too slow paced for a film of the thriller genre. Thriller films typically use multiple fast paced shots. In the case of V for Vendetta, the overall speed of the trailer is fast, but it slows down at points especially where the characters are talking, we tried to mirror this as we want to keep the antagonist somewhat enigmatic whilst making the protagonists somewhat likable so the audience can connect. Originally we weren't able to use some of our shots which made it difficult to make the trailer fast while still being a decent length but, we later figured out how we could which allowed us to have more shots and speed up the trailer.

Change 3: Make it less chronological - Our audience felt that our trailer was too chronological, it started with the protagonists sitting together and then deciding to break into the school, which is what would have happened in the film. As a result we decided to put a bit at the start of the trailer showing one of the characters being abducted/taken by the antagonist leaving the audience questioning what is going on from the start, especially when they see the character sitting with their friends later. Also, we moved the news report to a later point in the trailer, this was mainly inspired by the trailer for The Snowman where a women is seen and then a scream is heard, followed by a news report. This makes the situation seem a lot more dire and puts the audience on edge through the rest of the trailer.

Change 4: Use more inter-titles - At first, we only had inter-titles at the end of the trailer saying it was "coming soon" and displaying the title. One suggestion was to include inter-titles at different points to build up tension e.g. "The scariest night of your life...". In the end we decided to go with two extra ones, one said "It's time..." which keeps the audience wondering, and the second one said "to draw". We felt this was appropriate as it is the tagline for our film and drawing can have two different meanings, the first being drawing with stationary, and the other being drawing a weapon such as a knife which our antagonist uses.

Changes to poster:

Positive:
  • Good layout (Key conventions displayed)
  • Nice fonts/design
Improvements:
  • Main image
  • Background
Change 1: Use a better main image - Originally I had planned to use an image of the antagonist's mask, but my audience said that it would be better to use something more interesting. I was basing it off of a trailer for the film "The Hole" where the main image is of a woman's face, but I later moved to other film posters where there is a character and setting such as: Shutter Island. In the end I feel as though it turned out a lot better. In addition, I used the burn tool on the mask and building, this made the building look a lot darker (which is a key mise-en-scene paradigm of the thriller genre) and made the antagonist look a lot more dangerous due to the mask being messed up.

Change 2: Use a background - At first I just had a black background with the mask covering it. But I felt this was too boring, I tried to make it look like a chalkboard to represent the fact the antagonist draws around his victims. However, through messing with the settings I made it look like a dark fog covering the black background. This was all behind a fog effect that I made (which through trying various things now looks like a dark cloud which I like as it combines two key conventional forms of pathetic fallacy to set the scene).

Changes to magazine:

Positive:
  • Good layout (Key conventions displayed)
  • Nice fonts/design
  • Background
  • Good effects
  • Good colours
Improvements:
  • Main image
  • Puff on left
Change 1: Use a better main image - Originally I had a picture of the antagonist standing in front of the woods but the quality wasn't very good so I retook it which meant I could change the size without it looking terrible and also apply various effects such as the gradient (to make it look like he is appearing from the forest) and the burn tool on the mask (to make it look more dangerous). I also positioned his head in front of the title as it made him look as though he was engaging the viewer, especially combined with the fact that he is centered and staring directly at the viewer.

Change 2: Replace the puff on the left hand side - My first draft featured an image of another film on the left hand side, which was surrounded by a disfigured square shape where the edges where contorted. I was unsure of how well this looked so made a back up which featured the text for a new film in a red circle which is outlined, but used the original idea anyway. Following feedback from my teachers I was told that it would look better without the box, so i went and used the circular puff instead, which I feel does improve the overall design by making it look less cluttered and of higher quality.

Wednesday 14 February 2018

Evaluation 2

How effective is the combination of your main product and ancillary texts


I have produced a video (above) to go along with this, it features a voice-over. The script that I used is below (trailer footage is from first draft).

In my three texts, I attempted to convey the genre of (psychological) thriller through various means. I wanted to make it seem stereotypical while also standing out from other films of the same genre. I feel as though the genre has been demonstrated effectively across of each of my texts.

My film is aimed at teenagers/young adults, aged 15-25, of both genders (but males will probably enjoy it more due to them stereotypically being shown to enjoy the genre more) and of working class (D/E). This is because the protagonists belong to these demographics and therefore the target audience may find them relatable.

Throughout all of my texts the focus is on the antagonist; in the trailer within the first few seconds the viewer is aware of his presence while not knowing a lot about him as his mask is only just visible when he is shown taking away one of the characters. This utilises the enigma effect where not a lot is known making him seem scarier and the audience wants to know more. Even at the end of the trailer, not a lot is known about him other than the fact that he has abducted at least two of the protagonists and is actively seeking one of them, but the audience still doesn't know who he is seeking or why which may convince them to watch the film in order to find out the answers. This enigmatic feel around him is also reflected in my poster and magazine cover. In my magazine cover the antagonist is shown suddenly appearing from the woods which makes him seem mysterious, and in both my magazine cover and poster, his mask is messed up which it is not in the trailer. This could connote that he is dangerous and also leaves the viewer questioning "why?". This is similar to V for Vendetta where not a lot is known about the main character (antihero) giving him a feel of danger and mystery.

Another form of synergy between my three texts is the font. In each of them the "Biro" font is used at some point (in each title in the trailer, the tagline on the cover and title, tagline and reviews on the poster). We chose the Biro font as the antagonist's sign is leaving drawings on the people/where they were and the Biro font looks like it is hand drawn and also looks somewhat unsettling which is fitting of the thriller genre.

They all also use dark lighting - a key mise-en-scene paradigm. The dark lighting is key for any thriller film; it makes the atmosphere a lot more tense because the dark is a representation of the unknown which people fear, and if our antagonist is associated with the darkness it will make people fear him further. The images in the poster and magazine cover were originally quite bright so I had to use the burn tool and filters to make them darker. This also draws attention to the other conventions of the texts, such as: the main image of the antagonist.

The setting of the poster is the school in which the trailer is set - at school. This will be effective in attracting my target demographic as they will still be at school/university or would have left it recently.

Another form of synergistic elements between the poster and trailer is that they also feature key institutional information; this information includes the names of actors and other people in the production team as it is important that they are recognised for their work. The poster takes this further and lists the main actor at the top of the page. The reason for this is that the lead actor would have put in the most work and would likely be the focus of the narrative. In addition to the institutional information, they each have information about reviews. These reviews help to sell the film as it shows that major film reviewers enjoyed the film, as these sources are trusted and established reviewers it would convince people to watch the film as it shows it is of good quality due to the reviews being positive too.

In addition, the tagline for our film is "Time to draw". In the trailer, we used this as a form of inter-titles. We had "Time to..." at one point in order to leave the viewer wondering what is going to happen next. A few clips later, "to draw" is shown and with the different connotations of the word "draw", different viewers may have different interpretations (drawing with stationary or drawing a weapon), but both are correct. My poster also uses this tagline, but uses a # in front of it. This is popular on Twitter for talking about a subject, and Twitter and other social media are predominately used by my target demographic.

To conclude, I feel that my texts use synergy and work well together in order to establish the (psychological) thriller genre which allows me to attract my target demographic, through an established character and narrative.

Monday 12 February 2018

Evaluation 1

In what ways does your media product use, develop or challenge forms of conventions from real media products?


Frame 1: Title - The title of our film is "Sharpie". This is a play on words through the different meanings of it; one connotation is that it is related to sharp objects such as knives which our antagonist is shown to prefer, this is also the case for many other characters in thriller films, such as the masked man from V for Vendetta - even though he has access to a wide range of guns, he is shown to primarily use knives. The alternative connotation is the relation to the marker pen of the same name as our antagonist is shown to leave drawings on things/people similar to The Snowman where the killer leaves snowmen or messages for the protagonist.


The font we used was Biro. We felt that this was appropriate because it looks as though it has been hand-written, this could make the viewer feel somewhat uneasy because the antagonist would likely write in the style (somewhat messy) and it therefore makes him seem more realistic and believable. We also blurred the title a bit, this was to make it look more eerie and look similar to other title designs, such as: Seven where the title is white and features parts of it missing, alongside a more blurred out version in the background. We also took the idea of having a blurred out background version of it too, it makes it seem as though it is messing with the viewer and therefore, when combined with the fact that the antagonist drew the title, it breaks the fourth wall to an extent and makes the viewer feel more engaged than a basic title would.


Frame 2: Characters - There are four main characters in our trailer: the three teens/young adults and the antagonist. The teens are shown to be a stereotypical representation of their age group, this is demonstrated by the fact that they are out drinking together at one point. They are also joking around with each other on their way to the school. While it is usually older adults that are featured in thrillers, we wanted to use teens/young adults to easily construct the narrative; it makes more sense for them to be breaking into a location as younger people are typically shown to get into more trouble, such is the case with various teen angst films, such as Mean Girls where the plot revolves around a group of "mean girls". We also wanted to show that they were close friends through the use of the pub scene, this would make their characters more likable and believable.


Our antagonist is very stereotypical; he wears all black aside from a white, emotionless mask to conceal his identity. This mask also makes him more frightening as the viewer and protagonists have no idea who he is or what he wants. This is also similar to V for Vendetta, the man wears a mask fashioned to look like Guy Fawkes, and this gives him a sense of anonymity and leaves the viewer wondering whether he is good or bad until they see what he does in the trailer. The black clothes also make him blend into the darkness, making him even more dangerous as you don't know where he could be. This furthers the similarities between him and the masked main from V for Vendetta.


Frame 3: Settings - We filmed in settings expected to find teens/young adults - in a pub, streets and a school. The pub was mainly used to establish the protagonist's personality and show that they are quite carefree which is to be expected of people their age. The fact that they are stereotypical may also attract our audience as our target demographic is people of that age. The fact that they are shown to be normal could also add tension because the viewer doesn't know why the antagonist is threatening normal people like them.


The street scenes were used to build on the protagonist's characters further as they are shown joking around. It also introduces the antagonist who appears from one of the alleyways in the background, he doesn't do anything except stare at them and then retreat back to the alleyway which makes him seem suspicious due to how out of place he is.


The school is the primary setting where the antagonist's true motives are revealed. It is also a binary opposition as to what usually happens in a school; schools are a safe place for children and teens, but the antagonist has turned it into a place of horror. This could be seen as a reflection of his mind - twisted. It also forces the protagonists to become counter-types (scared and frightened instead of happy and carefree) and therefore make the audience sympathise with them for being put into the situation.


Frame 4: Narrative - This clip is of a piece of paper stating "It's you I'm after!". It is shown at the end of the trailer; this leaves the viewer wondering why the antagonist is doing what he is doing until this scene. The preferred reading of this is that the viewer understands it is one person the antagonist wants as connoted by the fact one person rips the paper off of the lockers and the other two are shown to be taken. Alternatively, "you" could refer to the whole group, which has complete opposite connotations to the preferred reading (Oppositional reading). However, we felt this was appropriate as it is a psychological thriller and we want to confuse the viewer while making sure that they aren't completely lost. 


This is similar to the trailer for The Snowman where one clip towards the end of the trailer shows some writing in the snow saying "I'm doing this for you mister policeman". This suggests that the antagonist knows a lot more about the protagonist, the the protagonist does the antagonist. This is also true for our trailer; the antagonist is actively seeking out one of the protagonists but the viewer doesn't know why. Furthermore, our trailer makes this element more suitable for the psychological thriller genre as we use the enigma code by leaving the audience questioning who the antagonist is, who they are chasing, and why they are chasing that specific person.

Frame 5: Video transitions - This clip and various others end in a quick cut to black or from one scene to another. This makes the pacing of the trailer seem a lot faster as it can be used to string together various different scenes. We mainly used this towards the end of the trailer when it was reaching its climax and the antagonist was shown a lot more. The start of the trailer was mainly fade to blacks because it is a lot slower paced and it is when the narrative is attempted to be established.


My favourite shot transition that we used was the mirror scene (above) where the main focal point is of the character in the mirror. This shot cuts to a different shot but then cuts back to it with the antagonist featured behind the protagonist. This again cuts to a different shot and then back, but this time shows the protagonist being dragged away by the antagonist. These three clips quickly built in with various other shots of action, I feel add to the dangerous feel of the antagonist by showing that he can be anywhere, at any time.

Frame 6: Camera shot - This is a bird's eye view of the location our film is set in - the school. We used a bird's eye view as it allows us to show the viewer the whole area. We put a news report over this explaining that a serious event had happened at the location. This makes the whole thing seem more serious and makes the atmosphere seem quite eerie because school's are supposed to be a safe place, this makes it very surprising and shocking when something serious/dangerous happens; it is the complete opposite of what you would expect to happen at a school.


We knew from the start that we wanted a news report explaining what had happened as it makes it seem more serious and professional. We had the idea during planning to film a bird's eye view over the news report. Originally we were going to use a drone, however, we were unable to retrieve the footage from the micro SD card, eventually we decided to film from the top of one of the buildings that got a view of the whole school and that worked well. We recorded the news report using an audio recorder and then had to remove the sound from the original clip due to it being very windy, and during editing we added the news report.

Frame 7: Props - In this frame, the antagonist has tied up one of the protagonists. The protagonist is tied up and his mouth is covered with tape. This is stereotypical for a thriller films as it is often related to torture/kidnapping where someone is trying to get another person to speak about something. The antagonist is also holding a pen as though he is about to draw on the protagonist which is what we wanted him to be remembered for (drawing on his victims), this suggests he is going to do something the protagonist. There is also only a bit of lighting, this could create a sense of unknown and confusion which is what we want the viewer to feel in our trailer as it is typical of a psychological thriller and it also leaves the viewer with questions which will only be answered if they watch the full film.


The pen is not very stereotypical for a thriller film, however, it fits with our narrative very well. It also fits with what we said - we want it to have stereotypical elements so that is recognisable, but we also want to confuse the viewer but not to the point where they are lost. This idea of drawing on victims is built on in The Snowman where the antagonist leaves images of snowmen for the detective to discover.

The key prop however, was the mask as part of the antagonist's costume (which I mentioned in frame 2). 

Frame 8: Magazine cover - This frame is of the bottom left corner of my magazine cover. It features an incentive stating that there is a "free poster inside!" accompanied by an image of my poster. Incentives are a key convention of magazines as it persuades people to buy them as they are getting something that they can't get anywhere else. For example: gossip magazine may use an incentive of an exclusive interview with a star. An alternative incentive would be what I used where there is a free item inside, these are usually posters but can be different things - children's magazines usually come with toys as children enjoy them, similar to the way film watchers may enjoy a poster of a film they like. The incentive also stands out; it is a yellow triangle (taking up one of the thirds from the rule of thirds grid) and contrasts with the stereotypical blacks, greys and reds drawing the viewer's attention to it. While it is hard to see the whole poster, the main image is immediately obvious and it is staring directly at the viewer, this may further persuade them to buy it because of how engaged they are with the main image.


Frame 9: Poster - The frame I chose from my poster is from the top of it. It says "ADAM STUBBS" across the top and underneath that are three reviews, these are all covered in a smoky/foggy effect. The use of the name is to show that he is the main actor in the film, if this was a Hollywood blockbuster, it would likely be where the name of the main actor/actress would be, this is similar with the film "The Hole" where Keira Knightley is listed, except her name is under the tagline and listed along with two others. The main image also feature her, similar to how my main image features Adam in a mask. I also used reviews as a means of selling my film because only the positive ones are shown making people think the film must be good. They are also written by popular film reviewers who people trust. The fog effect is there to make the poster look more interesting, it also looks like the titles are appearing from the fog making it look more mysterious. The fonts are also important; the name is in a bold font so that people recognise who the main actor is. The reviews however are in a Biro font as it is the font most related to our film, the names of the reviewers are in the same font as the actor's name to establish them as being important.